
This guide explains how to use the DMA DNA Grabber tool to retrieve the DNA of your DMA card, a crucial step often required by firmware developers for creating that is locked to your DMA cards DNA ID (to prevent the .bin from being shared or resold)
Before proceeding, ensure you have the correct JTAG drivers installed and functioning on your DMA card.
- File Download (Winrar required): Download
- File Password: “dmacheese”
- File MD5: 53e2248fb4dc99d3ffee1323a3374643a10eee88fb5a8c9424c5b500c85e4b9f
- Filescan: https://www.virustotal.com/gui/file/53e2248fb4dc99d3ffee1323a3374643a10eee88fb5a8c9424c5b500c85e4b9f?nocache=1
All steps in this guide should be carried out on your second PC.
Start by downloading and EXTRACTING the provided archive to your Desktop. You must first extract the files or else it wont work…
Then, connect your PC to the JTAG port on your DMA card.
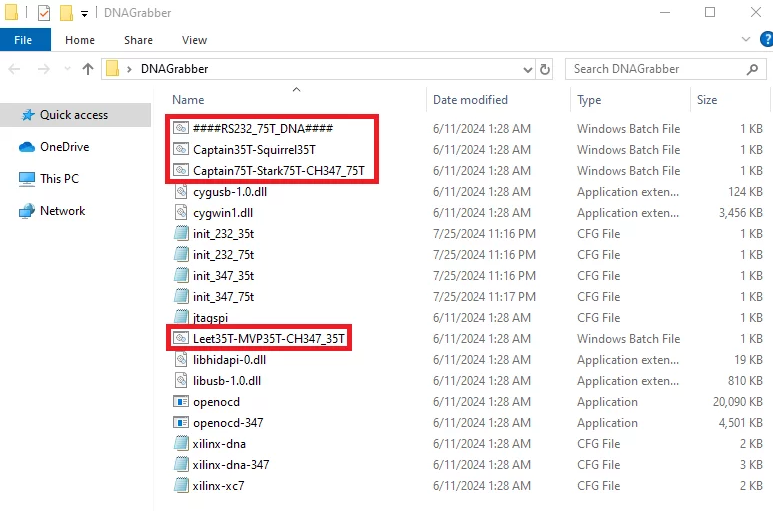
Inside the DMA DNA Grabber folder, you’ll find four .bat files. Identify and double-click the one that matches your DMA card’s JTAG driver.
If successful, you’ll see results similar to the example below. The line reading “DNA = 0000000 etc.” is the key information needed for the firmware build.
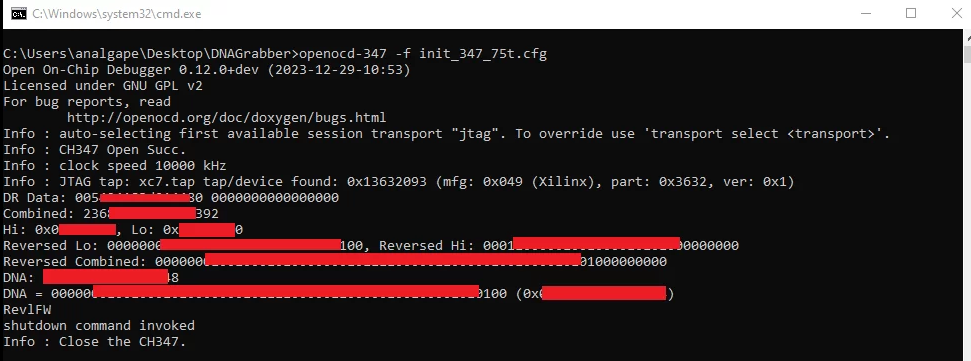
Once you find the “DNA =” line… Provide this string of text to the firmware developer.
Do not screenshot it, you must copy and paste the text.
Why Should You Use Locked Firmware?
Locking your firmware .bin to your DMA card ensures that the firmware is uniquely tied to your specific hardware. This adds an extra layer of security, preventing unauthorized use or duplication of the firmware on other DMA cards. By doing so, you protect the integrity of your setup and ensure that only your DMA card can utilize the firmware, reducing the risk of it being shared or misused by others.