
Ensuring that your Direct Memory Access (DMA) firmware is a true 1:1 copy is crucial to maintaining its intended functionality and integrity. In this guide, we’ll walk you through the steps to check if your DMA firmware is 1:1 using a specific tool. This method allows you to verify your firmware and hold vendors accountable for providing authentic firmware.
Step 1: Download and Extract the Tool
- Download the Tool: The first step is to download the tool required to check your DMA firmware. Click here to download the tool
- Extract the Tool: Once downloaded, extract the contents of the zip file. It’s recommended to move the extracted folder to your C: drive for easier access.
- Navigate to the Tool’s Directory: Cut and paste the extracted folder into your C: drive. This will simplify the process of accessing it via the command line.
Step 2: Open Command Prompt as Administrator
- Open CMD: Type
CMDin the Windows search bar, right-click on it, and select “Run as administrator.” This step is necessary to ensure you have the proper permissions to execute the commands. - Navigate to the C: Drive: Once the command prompt is open, type the following command to navigate to your C: drive:bashCopy code
cd C:This command moves you into the C: drive within the terminal.
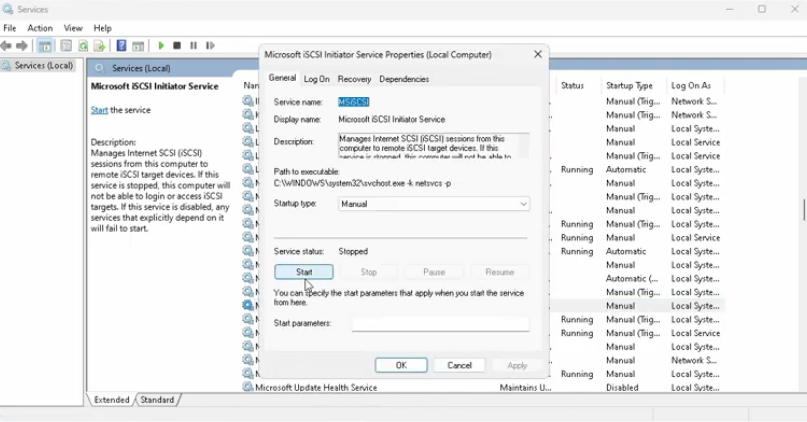
Step 3: Start the Microsoft Service
- Open Services: Type
servicesin the Windows search bar and launch the Services app. Here, you’ll need to find the specific Microsoft service required for this process. - Start the Service: Locate the service, right-click on it, and select “Start.” If it’s already running, you can skip this step. You can also set it to start manually after you’re done to avoid any unnecessary system processes.
Step 4: Use the Command Line to Access the Tool
- Navigate to the Tool’s Directory: In the command prompt, use the
cdcommand followed bytabto navigate to the folder where the tool is located. Repeatedly presstabuntil you reach the correct directory.bashCopy codecd <directory_name>This command opens the tool’s folder in the terminal. - Explore the Tool’s Capabilities: The tool comes with various flags that provide detailed information about your DMA and PCI lanes. Open the HTML documentation included with the tool to view these flags and understand their functions.
Step 5: Verify the DMA Firmware Configuration
- Open Device Manager: With the tool now accessible, open Device Manager. You should see your DMA device listed under devices. Right-click on the DMA device and select “Properties.”
- Check the Details: Go to the “Details” tab in the properties window. Here, under the “Value” section, you’ll find various pieces of information about your DMA device. Take note of the revision number (e.g., Rev 2), as you’ll use this information later.
- Run the Configuration Space Check: In the command prompt, type the following command to check the configuration space of your DMA firmware:phpCopy code
<tool_name> -SBI XXXReplace<tool_name>with the name of the tool you’re using. The-SBI XXXswitch will show you the configuration space of your DMA. - Review the Configuration Space: Once the command runs, review the output carefully. This is where you can determine if your firmware is scrambled or a true 1:1 copy.
Step 6: Explore Additional Features
- Explore Additional Switches: The tool offers various other commands and switches to provide more detailed information about your DMA device and PCI lanes. For example, using
das NNcan give you a more in-depth look at your PCI lane configuration. - Experiment and Learn: Take some time to explore the tool’s capabilities. The more you understand the configuration space and DMA functions, the better you can ensure that your firmware is authentic and functioning correctly.
Conclusion
Checking if your emulated DMA firmware is a true 1:1 copy is an essential step for anyone working with DMA devices. By following these steps, you can verify your firmware and hold vendors accountable for providing accurate and unscrambled firmware. Stay safe and informed in the ever-evolving landscape of technology.