
Setting up your Kmbox B Pro is essential for enhancing your gaming experience with advanced features like DMA aimbot and trigger bot. These features provide precise aiming and automated shooting, giving you a competitive edge.
This tutorial will guide you through the straightforward process of connecting and setting up your Kmbox B Pro, allowing you to control your main PC using a secondary PC seamlessly. Follow these step-by-step instructions to get your Kmbox B Pro up and running efficiently.
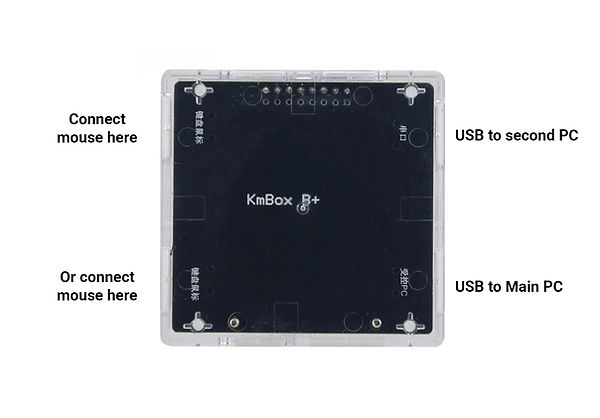
Step 1: Connect the Kmbox B+ Pro
- Unpack Your Kmbox B Pro: Ensure you have all necessary cables and components.
- Connect the Kmbox: Refer to the following image for proper connection setup:Make sure all cables are securely connected as shown in the picture.
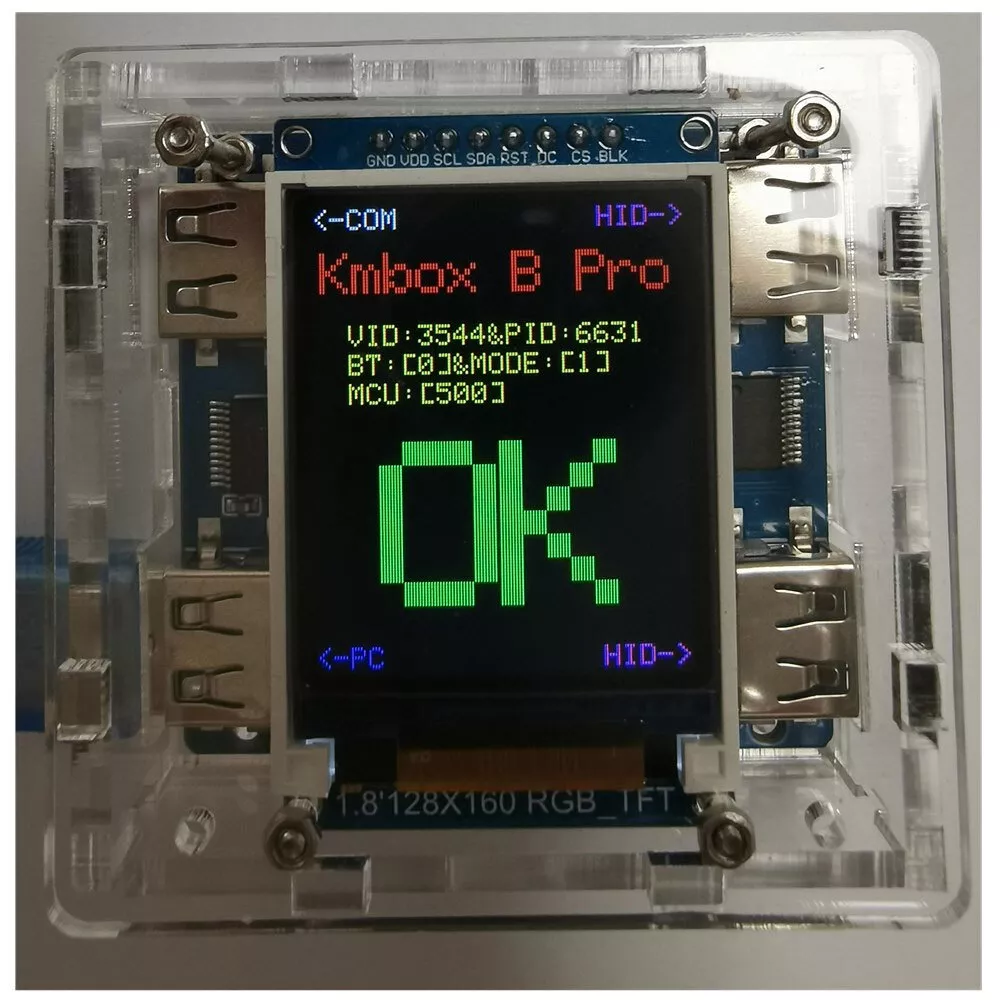
Step 2: Verify Initial Setup
- Power Up Your Kmbox: Once connected, power up the Kmbox.
- Check the Display: Your screen should display the following image, indicating the Kmbox is ready for further setup:
Step 3: Control the Main PC
- Connect the Mouse: Attach a mouse to the Kmbox.
- Test Mouse Control: You should now be able to control your main PC using the mouse connected to the Kmbox.
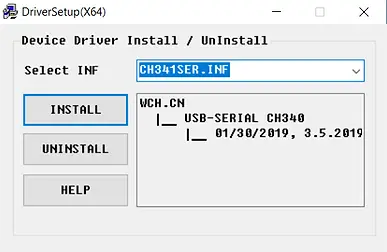
Step 4: Install USB Serial Driver
- On the Secondary PC: Download and install the USB Serial driver. This step is crucial for enabling communication between the Kmbox and the secondary PC.
Step 5: Test the Kmbox Without Running Cheats
- Run uPyCraft on Secondary PC: Launch UPyCraft V1.1 on your secondary PC.
- Access Serial Tools: Navigate to
Tools > Serialin the program menu. - Identify Connected Devices: Observe the list of connected devices. Note the COM port numbers (e.g., COM3, COM1, COM4).

Step 6: Determine the Kmbox COM Port
- Disconnect USB Cable: Unplug the USB cable from the secondary PC that is connected to the Kmbox.
- Identify Disappearing COM Port: Note which COM port number disappears from the list. This number corresponds to your Kmbox. For example, if COM4 disappears, your Kmbox is associated with COM4 (hence, the number 4).
Step 7: Run the Test Program
- Launch Test Program: On the secondary PC, run the test program.
- Enter Device Number: Input the COM port number of your Kmbox (e.g., enter 4 if your Kmbox was associated with COM4).
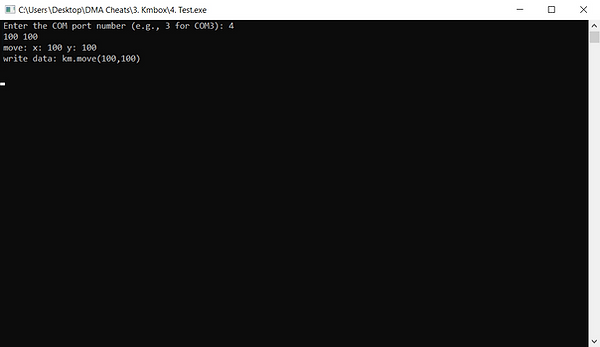
Step 8: Verify Cursor Movement
- Record Cursor Position: Note the current position of your mouse cursor on the main PC.
- Enter Coordinates for Test: In the test program, enter any coordinates, such as 100 100.
- Execute the Test: Press enter. The mouse cursor on your main PC should move to the specified coordinates if the Kmbox is functioning correctly.
KMBox B+ Pro Troubleshooting
If mouse which you connected through Kmbox doesn’t work on Main PC or test was failed:
- Make sure that you connected Kmbox right
- Try to connect USB cable to another port of Main PC
- Try to use another mouse
- Try to enter another number of COM port
- Try to use another mouse
- Use only wired mouse
How To Set Up KMBox B Pro Conclusion
By following these steps, you should have successfully connected and set up your Kmbox B+ Pro. This setup allows you to utilize advanced features such as DMA cheats, aimbot, and trigger bot.
Want To Get Started With DMA Cheats?
Click Here to Join our exclusive Discord community to get started cheating in your favorite video games!
- SUPPORT: Get personal help and tips directly from me
- COMMUNITY: Connect with fellow DMA gamers and find teammates
- UPDATES: Be the first to know about new updates and features